Wednesday, October 30, 2013

Double Your Ruffles Crocheted Scarf

Double Your Ruffles Crocheted Scarf

From: redheart.com

I am working on this pattern right know. 
I was at hobby Lobby and they had some new 
colors in 'I love this yarn'. I got quite a few new ones. 
I can't wait to finish this one with this beautiful 
Keylime/Limone. 

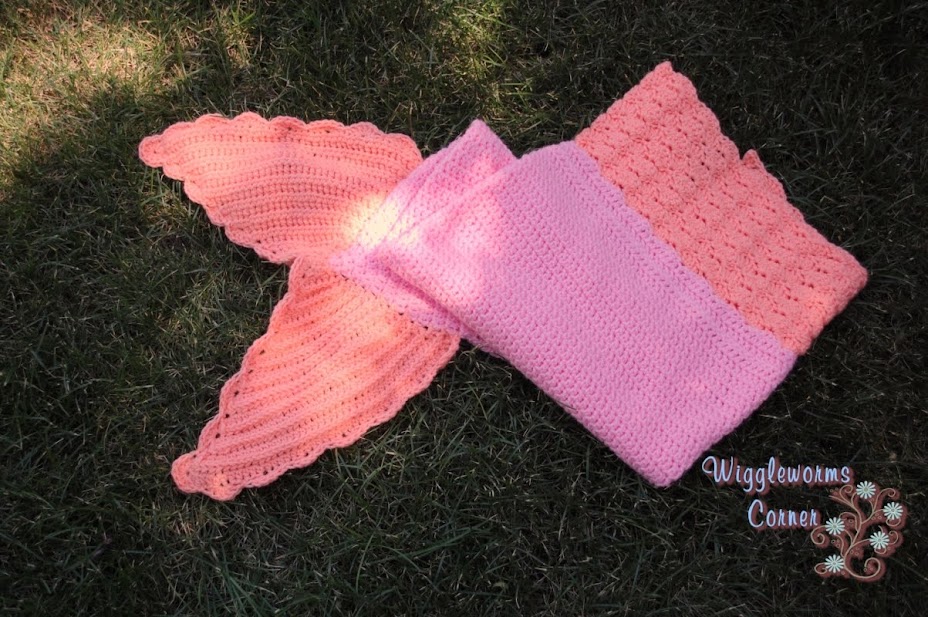
Here is the finished creations. I love just loving 
the color combo's. 


I have made one before from this pattern. 
Here is the link to:

I would love to see your pictures if you make this scarf. 

If you can't crochet and would like this Scarf. Come and visit me me 
at one of the following places of your choice. 
or you can email me at wigglewormscorner@gmail.com
Tuesday, October 29, 2013

Crocheted Lacy Fun Fingerless Gloves


Lacy Fun Fingerless Gloves
By  Angela Scherber


Materials
I used I love this yarn from Hobby Lobby – 100% Acrylic

Size F – 3.75mm crochet hook
Notes:  This pattern is worked in rounds. 

Pattern
Row 1: Foundation of 31 hdc stitches, then slip stitch into the first one. Be careful not to twist.


Row 2: Chain 4, Dc in same space, *Skip next 3 chs, 5 dc in next ch, skip next 3 chs, (dc, ch 1, dc) in the next ch , repeat from * across (you should end with a 5 dc), slip stitch into the top of the 3 ch


Row 3: slip stitch to center of ch 1 spot, ch 3, 4 dc in the ch 1 spot, skip next 3 dc, (dc, ch1, dc) in next dc, * 5 dc in next ch 1 sp, skip next 3 dc, (dc, ch 1, dc) in next dc, repeat from * to the end


Row 4: sip stitch in the next two dc, ch 4, dc in same space, *Skip next 3 chs, 5 dc in next ch, skip next 3 chs, (dc, ch 1, dc) in the next ch , repeat from * across (you should end with a 5 dc), slip stitch into the top of the 3 ch


Repeat rows 3 & 4 till desired lenth to the thumb area. The last row should be row 4


Thumb row: sip stitch in the next two dc, ch 4, dc in same space, Skip next 3 chs, 5 dc in next ch 1 spot , skip next 3 chs, (dc, ch 1, dc) in the next ch ,  Skip next 3 chs, , 5 dc in next ch 1 spot , skip next 3 chs, (dc, ch 1, dc) in the next ch , ,  Skip next 3 chs, , 5 dc in next ch 1 spot, ch 7 and slip stitch into the 3 ch of the beginning of the row


Repeat rows 3 & 4 till desired length.


Last row I did a hdc (there should be 31 just like the first row)


Weave in all ends

I made these in the team colors for NDSU. You can do all one color or switch off in each row or every other row. Have fun with it. 
 
Happy crocheting

If you have an questions or issues with the pattern. Please feel free to contact me on here or at wigglewormscorner@gmail.com

 If you can't crochet and would like these Fingerless gloves. Come and visit me me 
at one of the following places of your choice. 
or you can email me at wigglewormscorner@gmail.com


Just a friendly reminder that all my patterns are protected under My Free Copy right. Please do not post them as your own, copy or paste any parts of them, or sell them without my permission. However you are free to use my patterns to make and sell your own items.
Thank you
Ann
Wiggleworms Corner

Thursday, October 10, 2013

I have been a Busy, Busy Bee (Pattern & Video included)

I have been a Busy, Busy Bee
(Pattern & Video included)

I have been a busy bee working hard on creations. 
Some are gifts, some are for my girls for 
Halloween and a few orders. 

 Crocheted towel holders 
(for and order)
I love these. I have a few around my house. 
They hold towels so well and so glad I made 
these. I got tried of towels falling off. 


My girlfriends is having a baby girl in January 
and her baby shower was last weekend. I knew I 
wanted to make her something fun. 
The top picture is knitted pants and a dress/top. 
I got the dress/top here : 
The pants I made up my own pattern for them. 
I will have to write out the pattern and make a post 
on it. 
The Cherry Blossom Hat  (LINK) I am 
just in love with. I want to make myself one. 
It is on my list of things to do. 


Lacy Headband - I saw this and just had to make it. 
Here is the link to the pattern: Easy Lacy Headband 
Video on how to do it: Easy Lacy Headband

Someone asked about if I made Panda Bear hats and I have
been wanting to do one. So I got inspired and made one. 
This I did from making up my own pattern. 
Here is another one I will need to write up a pattern 
and get it posted. 
 My girls Halloween hats. My oldest wants to be a ghost. 
I saw a picture of one and thought she would like this look.
My 6 year old wants to be a Ladybug girl(I love the names
she comes up with each year on what she wants to be. Last year she
was a puppy witch. So I made her a puppy hat and she wore a witch outfit. I love this girl). 
 Always one of everyone's favorite. 
I call them Twinky hat (all thanks to some guy 
at hubby work. He calls the twinky's and it stuck with
me). 
This is one I also do just from making up my own pattern. 
 To finish up with
Inspired Minnie Mouse ears. 
Here is a picture of what they look like on. 
 

Keep your eyes posted for new patterns added soon.
Yesterday I went to Hobby Lobby to get a couple of colors and 
they have some new colors. I couldn't resit and got a few of the 
new ones and will be working on some new creations. 

Happy crafting!!!! 

 If you would like any of these creations. Come and visit me me 
at one of the following places of your choice. 
or you can email me at wigglewormscorner@gmail.com

Friday, October 4, 2013

Couple of fun hairstyles

Couple of fun hairstyles

Here are a couple of fun 
hair styles. They are bits and pieces
of others I have seen. I will add video's
 of how to do certain parts. 

Dutch side braid with flower
I did this one for my daughters back
to school night. She also left it in over
night and wore it the next day.
  

 Her ponytail holder had a flower on it. 
So we wrapped it around into a bun and put 
it the flower in the middle and put some
bobby pins to hold it down. 
It was so perfect for a hot summer day. 

Rope style bun

 I wanted something simple but fun. 
I left some of my bangs out and did a a roll
up. Not sure what you call it. But here is how to do it. 
In this video go to about 8:20 in and it will show you
how to do your bangs if you want to do this. 

 For the back. I put it back into a ponytail. 
Divide into two parts and then did a
rope braid for each section. Then I wrapped them 
around to form a bun and used bobby pins
to hold them in place. 

If you have any questions. Please feel free to ask
here or send me a message at
wigglewormscorner@gmail.com. 

Happy Styling!!!